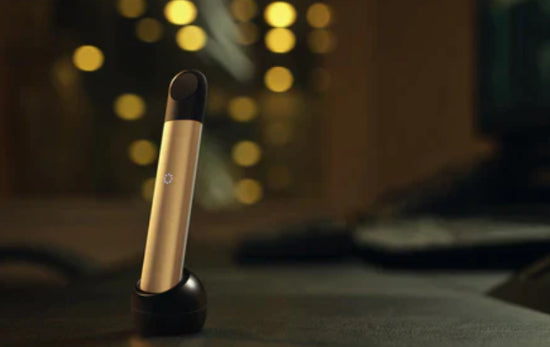
How to Set Up Your RELX Vape Pen: A Complete Guide
Congrats on purchasing your brand new RELX vape pen. Whether you’re new to vaping or experienced, you probably already know that investing in a quality vape pen can make a massive difference in your vaping experience.
However, consistently producing vapours that taste good and have the consistency you want requires more than just a nice pen alone. The setup process can make or break the whole experience.
If you’re unsure how to set up your new vape pen and desperately want to avoid such horrors as a dead battery or burnt vapours, then check out the step-by-step guide below.
Step 1 - Charge Device
Unlike other forms of inhaling nicotine, vape pens require a little bit of advanced planning. Since most vape pens run off of a built-in internal battery, you’ll need to make sure yours is fully charged before you can enjoy it.
Luckily, charging a new vape from empty to full usually takes about 2-4 hours, with some requiring just about an hour of charging duration, depending on its size and the battery type. Most pens should come with the necessary battery charging equipment in your kit, including the cartridge itself, an approved USB cord, and often a wall adapter.
Accessing the battery cartridge is probably the most tricky part, as they can sometimes be tucked away inside the pen and hidden from view. Usually, though, all it takes is a quick twist and unscrew of the bottom, and the battery should pop right out. However, do note that vape devices with built-in batteries do not need battery replacements.
If you’re having more trouble locating the cartridge or have questions about the battery kit, you should contact the manufacturer. Like all electric or battery-operated devices, improper use could lead to injury to both yourself and your brand new vape.
Step 2 - Check Coils
While vapes appear relatively simple to use, there are still some tricky technical terms you’ll need to master before properly using your new pen.
Probably the most important is the coil.
The vape coil essentially causes the e-liquid to heat up within the device, transforming it into a thick vapour. You can locate the coil quickly when you take your device apart because it is attached to the pen’s wicking material, almost always cotton but can also be rayon, silica, or mesh on occasion.
Whenever you get a new pen, you’ll want to ensure that the coil is correctly wrapped around the wicking material. If it’s not tucked against the cotton and in a tight spiral shape, then you’ll want to take action to fix it.
Without a coil that’s been fully tightened, you’ll lose liquid through the surrounding air holes and not be able to produce any vapour.
Step 3 - Prime Coils
Besides being tightened and tucked inside the wicking material, there’s also a priming process your coil has to go through before being fully ready to produce vapour that is the complete consistency and taste that you’re anticipating.
To avoid taking a noticeably dry hit or having an unpleasant burnt taste, you must ensure that the wicking material is fully saturated with e-liquid beforehand. The best way to do that is by priming the coils.
Priming the coils just means lubricating them before heating them. By adding a few drops of e-liquid to the coils before you fill the tank, you’ll be making sure that the wicking material around it gets good and soaked ahead of time.
Only fully primed coils — and by extension fully saturated wicking material —will be capable of producing thick, flavourful vapour, so this is a crucial step you can’t miss.
Step 4 - Steep E-liquid
So you’ve primed the coils, and now you’re ready to go, right? Incorrect.
Even the most perfectly primed coils won’t adequately saturate the wicking material around them unless given a little bit of time to steep. Vape experts suggest letting your e-liquid steep for about 2-3 minutes after filling the tank or pod with it to give it the total amount of time necessary to soak the cotton thoroughly.
If your cotton is still dry when the coils heat up, you risk burning it, which is dangerous and ruins the flavour.
Step 5 - Turn On Device
Finally, with your coils primed and your oils steeped, you’re almost ready to begin using that new vape!
All that’s left now is the struggle to turn the device on, which, admittedly, can be a little tricky. To prevent vapes from turning on unexpectedly in your bag or pocket, they are designed only to turn on after a very intentional motion.
Five quick clicks to the power button in rapid succession should do it. However, if you are still having trouble, it could be that your vape was designed to be even that much more reliable, so check the manual or other manufacturing information.
Other Things to Keep in Mind When Setting Up Your Vape Pen:
1. Liquid Ratios
Not all vape users have the same preferences for vapour, and the differences in liquid ratios reflect that.
A thinner liquid (something 50:50 or under with a coil 1.0 ohm and over) will require less heat to vaporise and therefore come out smoother and easier to take in. However, if you prefer thicker vapour, try going for something in the ballpark of a 70:30 ratio with a sub-ohm device (coil under 1.0 ohm).
Using a liquid that’s too thin with a sub-ohm coil will almost always cause leaking and burning.
2. Coil Replacement
Even the best coils typically only last around 5-7 days before needing replacement. When setting up your vape pen, you should also be prepared to change the coils as soon as they lose their flavour to prevent damaging your vape pen with unnecessary burning.
Conclusion
When it comes to having the vape experience that you want, buying a quality pen will only get you so far.
While a nice pen is important, using the proper techniques and materials to get your pen ready for use is essential. Skipping any of the steps above could cause a poor flavour at the best and damage to your new pen at the worst.
Take the time to set up your vape correctly, and your taste buds will thank you for it later.
Also in Vape Knowledge

RELX MaxGo Series Showdown: Which Powerhouse Matches Your Vaping Rhythm?

Beyond Disposable: How RELX MAXGO 33K & 12K Redefine Sustainable Vaping Excellence

How Long Until I Can Vape After Wisdom Teeth Removal?
Vaping after wisdom tooth removal is not recommended, as it can cause complications like dry sockets. Patients should wait at least three days before vaping to ensure proper healing and minimize risks associated with the extraction site.


